2018年4月26日星期四

GM TECH2 program DDM, enable comfort opening closing and learn pinch

Device to use:
GM TECH2
Security via TIS2000! Without this you won’t be able to add anything!!!
I bought GM Tech 2 $358 (shipping not included), details:
TIS2000 $18 free shipping, from OBD2TOOL
Step –by – Step Procedure
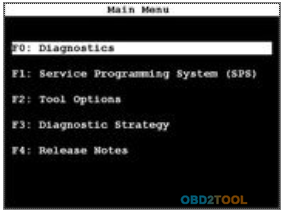
1.Go to “Main Menu”, select “Diagnostics”
4-1
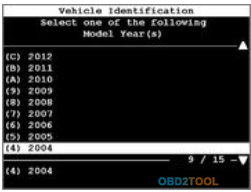
2.Select one of the following model year(s), I.E 2004
4-2
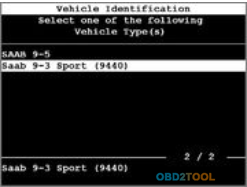
3.Select one of the following vehicle type(s), I.E Saab 9-3 Sports (9440)
4-3
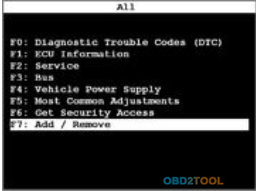
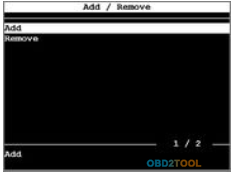
4.Select “Add/ Remove”
4-4
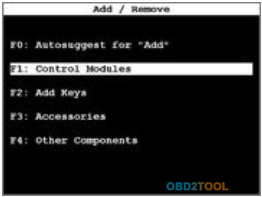
5.Select “Control Module”
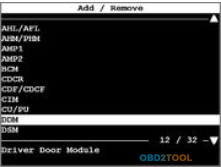
4-5
6.Select “DC04”
4-6
7.Select “Add”
4-7
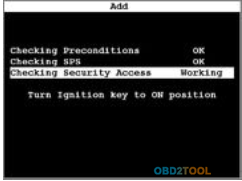
8.Select “Checking Security Access” –Working
4-8
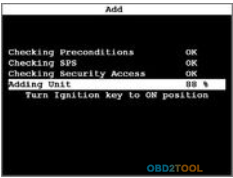
9.Select “Adding Unit”
4-9
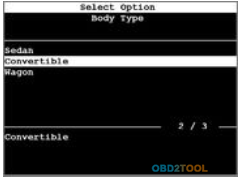
10.Select body type – Convertible
4-10
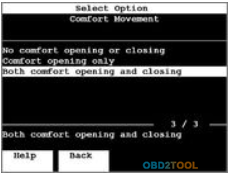
11.Select “Comfort Movement” – Both comfort opening and closing
4-11
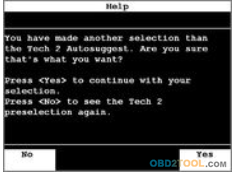
12.Press “Yes” to continue with your selection.
4-12
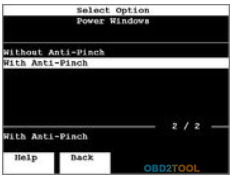
13.Select “With Anti-Pinch”
4-13
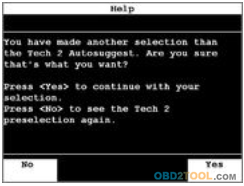
14.Press “Yes” to continue with your selection.
4-14
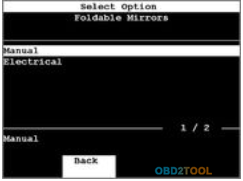
15.Select “Manual” as foldable mirrors.
4-15
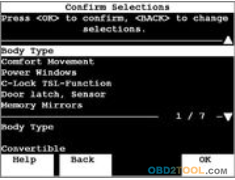
16.Select “Body type”
4-16
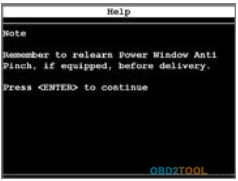
17.Press <Enter> to Continue
4-17
Thanks for reminding me Tech2! I will do this down below!
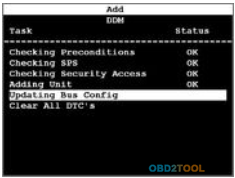
18.pdating “Bus Config”
4-18
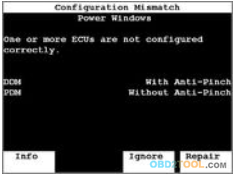
19.Looks like Car Scanner Tech2 caught an error! Passenger door’s anti-pinch was disabled somehow… It fixes it automatically.
4-19
20.Add / Remove ECU finished
4-20
So that was pretty straight-forward right? Now hit Exit and go back. We have to setup pinch protection under the service tab…
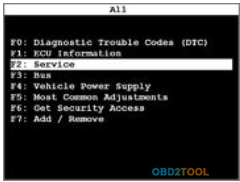
21.Select “Service”
4-21
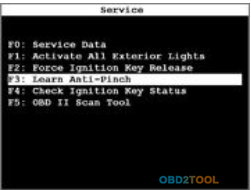
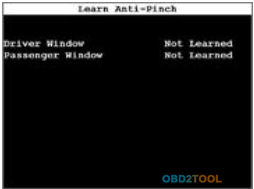
22.Select “Learn Anti-Pinch”
4-22
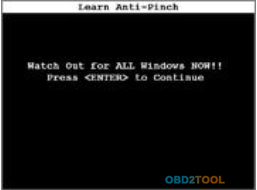
23.Press <Enter> to Continue
4-23
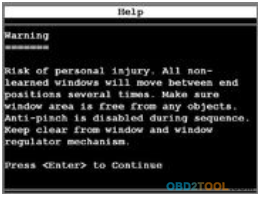
24.Press <Enter> to Continue
4-24
25.Holy Cow! My fingers almost were chopped off!!!
4-25
26.Press <Exit> to quit
4-26
http://cheapobd2scanner.com/2018/04/23/gm-tech2-program-ddm-enable-comfort-opening-closing-and-learn-pinch/

2018年4月21日星期六

How to use Xentry DAS on AVDI passthru


10-1
What is the AVDI recognized by Xentry?
Xentry Passthru is different from from regular Xentry openshell. Xentry passthru does not use SDconnect toolkit. When you launch the program it will give you a dropdown where you can choose which J2534 device (can be found at http://www.obd2tool.com/) you want to use.
How to use Xentry Passthru?
If you got the Xentry Passthru installed, there is a tool which will do the dirty work for you.
Normally it is not linked or doesnt have desktop shortcut but resides (at least in my installation)
under
C:\Program Files (x86)\Mercedes-Benz\xentry\bin\SelectPTDevice
IF you have installed your passthru (would that be AVDI or anything else) with correct drivers, registry entries etc it will just present you with list of options and you select your VCI from dropdown list.
Heard good things about fvdi abrites commander J2534 compatibility (real thing, don’t know about clones) so it shouldn’t be a big deal. Recently i have tried to use BOSCH KTS560 as passthru and it works perfectly okay.
For curiosity, i did also test the 20-euro MiniVCI that gets normally bundled with Toyota techstream packages. to my surprise it also works albeit slow and sometimes freezes the application. This one can be actually made to work even with old DAS like 2009, 2012….it’s just matter of proper settings in cal.ini and slave.ini
For DAS/Xentry users:
Old thread – but do not run the SetPassThruDAS.exe, as it was written for DAS/Xentry for Windows XP, and not Openshell or star diagnose Xentry Passthru. All you need to do is install a fresh OS (Windows 7 Enterprise x86 or x64 SP1) ideally on a physical laptop, connect the AVDI device to the USB port and run the SetupInterface_yourserialnumber_PASSTHRU_xxxxxxx.exe and Next through the setup process. If you have a current version of the Passthru software, you will see a grayed out option for installing drivers for DAS that you cannot select, but do not be concerned about that. It will detect the AVDI, and install the appropriate J2534 dll files in the Windows\System32 directory. Then continue installing your Passthru software provided on the Blu-ray from Daimler. It will take a while to install, and once it verifies your hardware ID and installs your StartKey, launch Xentry Passthru from the icon it creates, and it will prompt you first thing as to what interface you want to use. You will see Abritus72 AVDI PT (your serial number here) in the drop down box. Select that device, and that is all their is to it. Xentry should automatically communicate with the vehicle.

http://obd2trade.com/2018/04/17/how-to-use-xentry-das-on-avdi-passthru/

2018年4月7日星期六

Autel Maxisys Elite Programming and Coding

Since the introduction of OBD II and leading up to modern Hybrids and EVs, computers and software in cars have been expanding at an exponential rate.In-car software is becoming one of the leading needs for service, and updating
software may be the only way to fix some of these issues:
*   Drivability
*   Fuel Efficiency
*   Power Loss
*   Fault Codes
*  Durability of Mechanical Parts
The Programming and Coding function is used to re-flash the vehicle control modules, it allows you to update the computer software on the vehicle to the latest version, as well as to reprogram adaptive data for certain components after making repairs or replacements.
NOTE: The Autel OBD2 Scanner programming function can only be applied through connection with the J2534 programming device, which serves as a PassThru interface to establish communication with and transfer data to the vehicle’s ECU.
Available programming or coding operations vary by the test vehicle, and only the available operations display in the menu.
There are two general types of programming operations:
A.  Coding – also known as Teach-in Program, Component Adaptation or something similar, is used to reprogram adaptive data for vehicle control modules after repairs or replacements of vehicle parts.
B.  Reprogramming Operations – downloads new version of software subscription from the on-line server database through internet access (this procedure is done automatically when the MaxiSys display tablet is connected to the internet, so there is no need to check for software subscriptions yourself), and reprograms the newest software version to the vehicle’s ECU.
NOTE: Ensure that the display tablet is connected to the Internet before applying the ECU Programmin function, so that the display tablet is able to obtain access to the manufacturer’s server for update service.
Selecting the Programming or Coding function opens a menu of operation options that varies by make and model. Selecting a menu option either shows a programming interface or opens another menu of additional choices. Follow on-screen instructions while performing the programming or coding operations.
How and what information is presented on the screen varies according to the type of operation being performed.
Variant Coding
39-1
The main section of the Maxisys Elite Variant Coding screen displays a list of vehicle components and the coding information which mainly consists of three parts:
1.  The top line on the list displays the instruction of how to use the functional button at the lower right corner of the screen to manipulate the coding operations.
2.  The second part under the top line of the list displays all available systems for coding on the left side, and the coding data or value on the right side.
3.  The bottom line of the main section displays the functional buttons which allow you to manipulate the operation.
Check the vehicle condition and the coding information carefully, and use the functional button to edit Codes for the corresponding components, tap Send when you finish edit for all the items. When the operation is done, an execution status message such as Completed, Finished or Successful, may display.Tap the ESC button to exit the function.
Reprogramming Operation
Typical reprogramming operations require you to input and validate VIN number first. Tap the input box and enter the correct number, the programming interface then displays.
39-2
The main section of the reprogramming interface provides you certain hardware version, and current software versions’ information, as well as the information of the newest software versions to be programmed to the control units.
Throughout the programming procedure, a series of on-screen operational instructions will display to guide you through Auto diagnostic tool. Carefully read the on-screen information and follow the instruction to execute the programming procedure.
IMPORATANT: When reprogramming onboard, always make sure the vehicle battery is fully charged and in good working condition. During reprogramming there is a risk of having the operation failure if voltage falls below the proper operation voltage. Sometimes a failed operation can be recovered, but there is a chance that failed reprogramming could ruin the control module. We recommend connecting an external battery charger to the vehicle to ensure a successful operation.
Occasionally a flash update procedure may not complete properly. Common causes of flash errors include poor cable connections between the display tablet, VCI, and vehicle, turning off the vehicle ignition switch before the flash procedure is complete, or low vehicle battery voltage.
If the process crashes, recheck all the cable connections to assure good communications and reinitialize the flash procedure. The programming procedure will automatically repeat if the previous operation does not succeed.