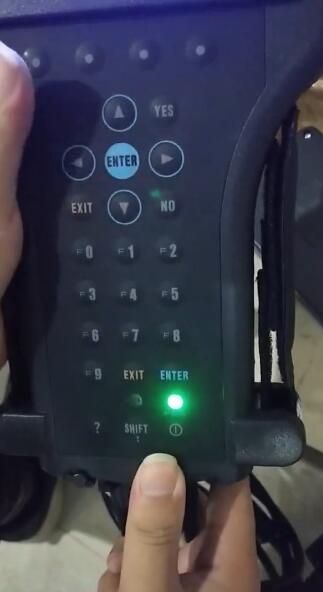
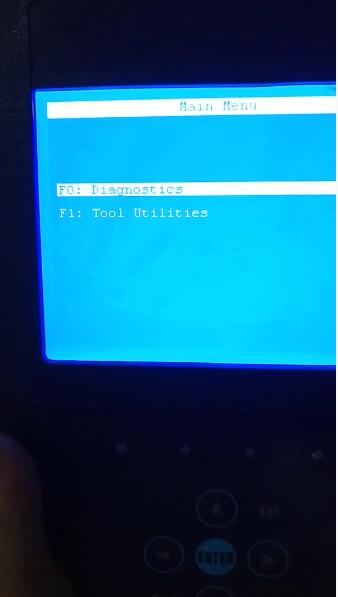
显示标签为“GM Tech 2 Scanner”的博文。显示所有博文

2021年3月4日星期四

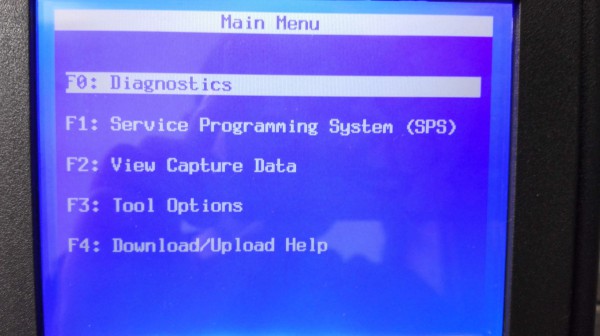
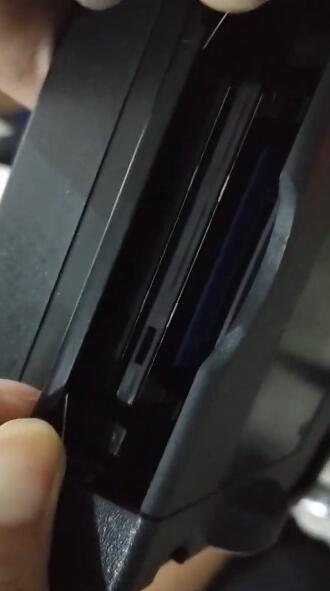
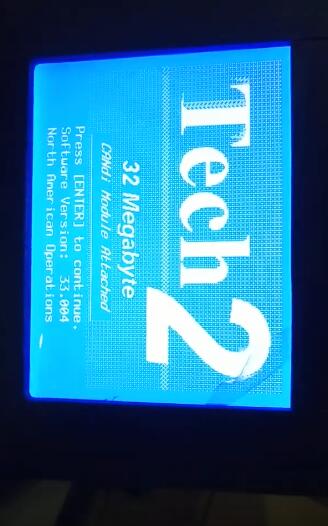
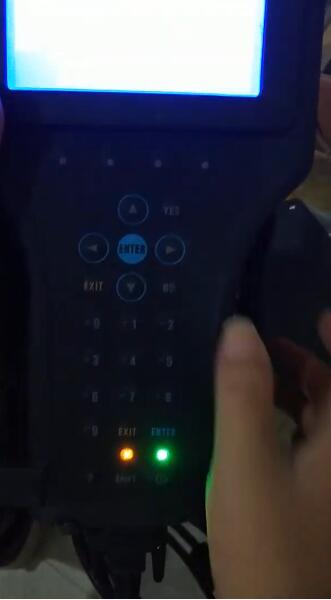
How to switch GM tech 2 32mb memory card

32MB GM Card,works with GM Tech 2, includes a 32MB PC Card loaded with the latest released GM Software.We are available with six kinds of software including SAAB, OPEL, GM, ISUZU, Suzuki and Holden.

Software List:
GM
GM-English 33.004 1991-2014
GM-Spanish 31.007 1991-2014
GM-French 32.007 1991-2014
GM-Portuguese 32.007 1991-2014
GM-Japanese 32.006

OPEL
OPEL-English Newly Update to V180 1997-2014
OPEL-Italian 133.001 1997-2012
OPEL-Spanish 91.001 1997-2009

SUZUKI
SUZUKI-English 01.210.020

SAAB
SAAB-English 148.000

ISUZU
ISUZU-English 107.021 2006-2010

Holden
Holden-English  149.000 1999-2013 (For North American Area Only)

GM Tech2 Card Opel Software Update to V180 Support Cars from the Year 1997 to 2014


Package List:
1pc x 32MB Card for GM TECH2

How to switch GM tech 2 32mb memory card

Images


2020年3月5日星期四

Is possible to change idle speed with GM Tech II

Possible to raise and lower idle speed using a Tech II scanner?
GM-Tech-II
Look here – questions and answers from users and technicians
2003 escalade, found a TSB regarding rough idle, I need to raise and lower the idle by +/- 50 rpm. How do I do this with a Tech 2?
For the 2003, if the tsb refers you to a new calibration you might able to reprogram with tis2000 (depends on the tsb date).
Note that things can’t be done with the scan tool alone.
2011 escalade would like to know how to do a VIN reprogram/ relearn for the radio.
For the 2011 you’ll need tis2web.
Note that things can’t be done with the scan tool alone.
Is it possible to adjust the idle rpm with the Tech II?
You cannot change your idle rpm with the Tech 2. On some vehicles you can raise and lower the rpm by controlling the iac motor, but only for diagnostic purposes.
What do I need to be able to change my idle speed for cold conditions . ECM program adjustment? should be able to control it with cruise control switch correct?2002 GMC duramax 2500HD . (1GTHC23182F202689 – 2002 GMC VIN.)
your vehicle can the ecm reprogrammed for the fast idle increase. your local dealer should be able to help you out.
Which one Tis2000 will support escalade 2009 to reprogram with Tech2?
For 2009 you will need an online subscription.
I’m trying to change the idle speed on a 98 camro m6, ls1, with a big cam for a friend of mine.
Can anyone enlighten me as to the proper procedure to adjust it with a GM tech 2? He wants it specifically set with the ecm.
You cannot do it with a TECHII. Simple as that. What you want to do is considered editing, and you cannot edit with a TECHII. Period.
Only thing you can do with a TECHII is upload GM specific files, tunes, updates, whatever you want to call them.
Raising of the idle can be done using the bi-di controls in the scanner function, but it does not burn it to the memory.
Drilling a hole in the T-body does you no good, because without raising the idle in the tune, the IAC will just close up more, trying to get the idle back down to the desired speed.
I assume the same is true for changing the rear gear ratio?
You can change gear ratios by changing RPOs. Totally different thing. Thats still not editing. It’s changing what the computer thinks the car came with from the factory.
You cannot tell the computer the car has a 4.56. You cannot change the idle.
To correctly change the idle, you need to increase the base idle airflow, as well as the idle speed. You need to purchase a tuner suite. HPtuners or EFIlive.
Is it possible for GM vehicles to get the ecm reprogrammed for the fast idle increase. your local dealer should be able to help you out. How it works?
Connect the Car Diagnostic Tool Tech 2 and follow the steps below to program the ECM for idle up feature with PTO operation:
Turn on tech 2 and build the vehicle
select “Powertrain” (Or “Vehicle Control Systems” on later models)
select “Special Functions” (or “Module Setup” on later models)
select “PTO Options”
select “Change Options” (soft key at bottom of the screen)
select F1 “PTO Preset Speed Control”
select pto max engine speed set to 2200 – 4400 rpm (not below 2200)
Note: These steps will not allow the engine rpm to exceed the rpm setting, even during normal driving if the PTO switch is on
select stand by speed (base fast idle ) set to 1200 (this setting is initial fast idle)
select PTO set speed – set to 1400 rpm
select PTO resume speed – set 1700 rpm
select PTO max engage speed – set to 1800 rpm (PTO engagement inhibit speed)
select PTO engine shutdown – no
select PTO engage relay – no
select PTO feed back -no
select “Reprogram” (soft key at bottom of screen) “Waiting For Data” displays on screen-once data comes back verify settings remain
key off- until tech 2 “beeps” and screen shows “no communication” (Very important step if missed setting will not store)
key on – verify settings remain on list
operate pto
loading..

2019年8月2日星期五

Feedback from GM Tech2 with CANdi TIS Works for GM/SAAB/OPEL/SUZUKI/ISUZU/Holden

I’ve got one and it works perfect on my 08

A few of us have them….. works great! Can also get to things like the rear air ride (if yours has that) which no other tool can deal with.

That being said I’ve seen on other forums where some people have major issues with their clones. Best I can say is I got my GM Tech2 from obd2tool and it works perfect.

It will come in handy sometimes. Now figuring out how to use all of the functionality will take a bit too. You can pretty much get right into diagnostics and whatnot pretty easy though. Programming takes a bit more as you will need to either install TIS2000 or pay for a short subscription to the ACDelco TIS system. TIS2000 is a pretty old program but does still have updates and whatnot for some things in our H2’s. The tricky bit is it runs on Windows XP. There is tons of info online about ways of getting that software installed and working though. The Tech2 will also come in handy for other GM vehicles as well and can give you a lot more info that most any other scan tool.

I’m pretty sure this one…. That is the same one I got a couple of years ago.

GM Tech 2 Feather:
1. Multi-langauge:English, Italian, French, Portuguese, German, Spainish, Korean, Japanese, Thai, Chinese
2. Update: via 32MB Software Card, when there is newer version, you can just buy new card to update
3. Year Coverage of Diagnosis:From 1992 to 2013, With Help of Tis2000 Software, It Can Do Programming for Cars Before Year 2007
4. Our GM TECH2 comes with with TIS2000 Software(CD)

Tech2 for GM Software Version:
GM           English 33.004  (Support Cars from 1991-2014)
SAAB       English 148
OPEL      English 180 (Support Cars from 1997-2014)
Holden    English 149 (Support Cars from 1999-2013) (For North American Area Only)
English  147.000  (Support Cars from 1999-2012 )(For Australia)
SUZUKI  English 01.210.020
ISUZU     English  CAN-BUS V180 (CAN-BUS support car models after 2010)
K-Line  11.680    1996-2014 (K-line support car models from 1996 to 2014)

2019年1月26日星期六

How to Self-test with GM Tech2 CANDi module?

The power light on the CANdi module doesn’t come on when connected to the GM Tech2 .If that’s what you mean mine does not light up either. I think they should flash when linked to the car’s computer as that means the CANdi module is communicating. Bosch instructions:
12
GM Tech2 CANdi User’s Guide:
P/N 08002749 03/07 ©2007 Robert Bosch LLC, U.S.A. All rights reserved.

The Controller Area Network Diagnostic Interface (CANdi)  is an in-cable module that works with the existing Tech 2 components including the VCI, cables, and adapters.

Installed, the CANdi module is fully backward compatible with current tester functionality. The module powers up in a way that makes it transparent to the user. That is, unless the Tech 2 enables features specific to the CANdi module, all signal lines function as they do without the

CANdi module. This allows the existing Tech 2 software to be used with no changes, whether or not the CANdi module is installed.

The primary function of the CANdi module is to add CAN capability to the Tech 2 tester. The following list summarizes the basic characteristics of the CANdi module:

Supports simultaneous communications on three CAN buses

Provides high speed UART communications with the Tech 2


The Tech 2 commands the CANdi module operation.

When installed, the CANdi module does not interfere with any diagnostic procedure currently performed using the Tech 2. The usage of a CANdi module does not require any physical changes to the Tech 2, its cables, or adapters. The module operates in transparent mode until awakened by the Tech 2. Upon initialization, the CANdi module operates under master control of the Tech 2. All functionality is determined by the Tech 2 application software which is loaded on the Tech 2’s program card. The CANdi module always operates in slave mode to the Tech 2, responding in high speed SAE J1708 to the tester.

Physical Interface and LED CANdi connects to the Tech 2 by way of the existing Data Link Connector (DLC) Burndy Connector. The vehicle side connection remains unchanged using the existing adapter to interface between the Burndy connector and the SAE J1962 connector. When functioning properly, CANdi’s LED flashes. In the event of a problem, the LED will be constantly illuminated.

Warranty and Technical Service

Included with your system is a Warranty Card that must be submitted to Vetronix for activation of the two-year warranty. For technical assistance, please contact Vetronix Tech Support at (800) 321-4889 ext. 2.

Good to know: The Candi Module should not plugged into your GM Tech2 unless your working on a later car ..generally 2005 plus. Olders car from 96 should NOT have the Candi Module attached.

Images: How to do CANDi self test with Tech2?
13
14
15
16
17
18
19
20
21
22
23
24
25
26

2019年1月1日星期二

GM SPS Programming: Tech2 Tool Remote Mode ECU TIS2000 Calibration Update

Here is the step-by-step instruction on programming GM (General Motors) ECUs with Tech 2 Scanner and SPS (Service Programming System) application in TIS2000.
NOTE:
Before using the SPS, make sure that the Tech 2 scan tool and the pc contain the latest software, the battery of the vehicle is fully charged, only the ignition is on power, and all cables are connected properly. TIS2000 will not work on 2007 up GM, and software must work together with TIS2000 USB key. If you need to program Saab ECU, you had to use Saab TIS2000 and USB dongle.
Main steps:
Step 1: Instruction for TIS2000 software
Step 2: Data request
Step 3: Data exchange
Step 4: Program ECU
Alternative Programming with “Pass Thru”
Check Programming result
Step 1: Instruction for TIS2000 software
1.Connect the Tech II to the pc.
Note: The hardware key (HWK) has to be registered prior to working with ‘Service Programming System’. To register a hardware key, the form that is enclosed with the hardware key kit has to be filled in and sent to the address at the top. In case the form is missing, the document is also in the TIS 2000 newsletter (see icon in the TIS 2000 tool bar). At first, the user receives a temporary code until the key is registered on the next TIS 2000 CD.
Hardware keys that have already been registered are still valid!
To register the hardware key select ‘Hardware Key Registration’ in the menu ‘Configuration’.
TIS2000 installation video guide
*   Start TIS 2000 on the pc.
*   Select the application ‘Service Programming System’ on the TIS 2000 start page.
Tech2-program-ecu-with-sps-in-tis2000-1
4. On ‘Select Diagnostic Tool and Programming Process’ (picture below) screen make the desired selection for
1) the used Tech2 diagnostic tool
2) the reprogramming of an ECU that was not exchanged or the replacement/programming of a new ECU
3) the ECU location.
Tech2-program-ecu-with-sps-in-tis2000-2
*   Click “Next” button to continue.
Step 2: Data Request
*   Connect Tech 2 scanner to vehicle. Power on device – “Tech 2” is displayed on the screen, then press “ENTER”.
*   Turn ignition to ON without start the engine!!!
*   Select “F1: Service Programming System (SPS)” in the main menu.
*   Press “F0: Request Info” on Tech 2.
*   If Tech 2 has already stored vehicle data they will be displayed now. In that case, Tech 2 asks you to either use the current data (hold data) or request further information from the ECU (continue).
*   For the selection of “Next” the vehicle has to be identified as requested by Tech 2.
Note: Depending on the model year and the selected model either a reprogramming of the ECU (F0: Engine) or of the TCM (F1: Transmission) can be selected.
*   During the Request Info the Professional Diagnostic Tool information from the selected device. If the ECU was replaced a “Request Info” has to be performed for the NEW unit. Since the new ECU is not programmed on delivery, the retrieved information is not complete. For that reason, TIS 2000 gives instructions as how to enter the missing vehicle data.
*   Follow the instructions on the Tech 2 on OBD2TOOL. Then press “Exit” on the Tech 2, switch it off and disconnect it from the vehicle.
Step 3: Data exchange
*   Connect Tech 2 to the pc, switch it on, and click on ‘Next’ on the pc.
*   Confirm VIN or, if necessary, enter correct VIN, then select ‘Next’.
Tech2-program-ecu-with-sps-in-tis2000-3
*   Validate vehicle data and, if necessary, change with the pull-down menus.
*   Click on ‘Next’. Button
Tech2-program-ecu-with-sps-in-tis2000-4
*   A new window displays a “Summary” (follow below) with the selected data. Continue with ‘Next’. Select “Reprog” button to download the latest calibration data onto the TechII diagnostic tool.
Note: It is not possible to reprogram an ECU with the same software version.
Tech2-program-ecu-with-sps-in-tis2000-5
*   The window ‘Transfer Data’ is displayed. A bar shows the progress of the download.
At the end of the download, a window is displayed with the request to connect the Tech 2 to the vehicle in order to finish the programming process.
Tech2-program-ecu-with-sps-in-tis2000-6
*   After the closing of the SPS application the TIS 2000 start screen is again displayed. Finally, switch off the Tech 2 and disconnect it from the pc.
Step 4: Program ECU
*   Connect Tech 2 to the vehicle.
*   Switch on Tech 2 – start screen appears.
*   Turn ignition (Do not start motor!).
*   Press “Enter” in the Tech 2 start screen.
*   Select “F1: Service Programming System” in the main menu and then “F1: Program ECU”.
*   Follow the instructions on the Tech 2 screen.
*   During the download the Tech 2 screen shows the message “Programming in Progress”.
*   At the end of the download the Tech 2 shows the message “Programming was successful”. The button “Exit” leaves the program. First, turn off the ignition of the vehicle, then switch off the Tech 2 and disconnect it from the vehicle.
*   Turn off ignition for 30 seconds before starting the motor. Additional information is available in the section “Check programming”.
Alternative Programming with “Pass Thru”
In addition to the procedure described above, there is an alternative programming mode called “Pass Thru”. In that case, the data are directly downloaded from the pc to the ECU in the vehicle.
Although the Tech 2 is still needed in that mode, the data entry and the download control is done directly at the pc. Altogether, that method is faster, and it is recommended when a pc with TIS 2000 is within 3m of the vehicle.
*   Connect Tech 2 to the vehicle.
*   Connect Tech 2 to the PC switch on Tech 2.
*   Start TIS 2000 on the PC.
*   Select the icon ‘Service Programming System’ (Fig. 1) on the TIS 2000 start page.
*   Start TIS 2000 on the PC.
*   On the screen ‘Select Diagnostic Tool and Programming Process’ (See picture below) make a selection for
***Pass-Thru mode
***the reprogramming of an ECU that was not exchanged or the replacement/programming of a new ECU
***the ECU location.
Then clock ‘Next’ button.
Tech2-program-ecu-with-sps-in-tis2000-7
Check programming result
After every repgrogramming of an ECU a test to check the successful programming has to perform as follows:
*   turn off ignition
*   wait for at least 30 seconds
*   start motor to confirm the successful programming
*   If the motor doesn’t start this points at an error. After the replacement of an ECU it has to be made sure that the necessary programming of the immobilizer was successful.
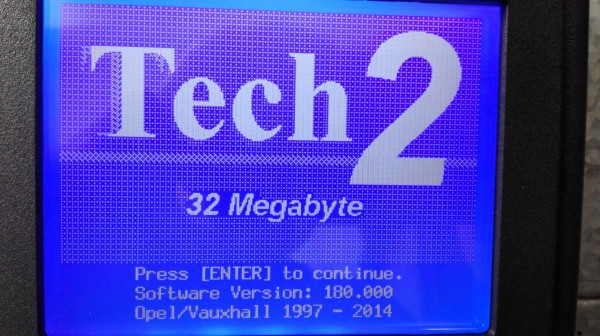
2018年12月23日星期日

Customer real experience with GM Tech 2 Scanner

Here is the real experience by our customer Mr.Gary Richardson on GM Tech 2 Scanner.
Bought the highest quality version as i didn’t want to risk any issues with the device, and it all works fine and i do not regret my purchase.
It arrived pretty fast, but i got a £17 customs charge which i didn’t realise i’d get.
First impression: the carry case is not the one shown in the photo’s, which is annoying as the one in the photo’s looks really good, With the cables and candi module stored underneath 2 flaps, the main unit and adaptors clipping in the top of the case etc.
What i got was a basic plastic case (with sharp metal catches) where everything is squashed in on one level in foam, it does the job i guess, but i’d really have prefered the better case i thought i was paying the extra £30 for.
I’d bought a genuine Ugreen rs232 to usb cable in advance, £10 off amazon, this is one of the few cables listed as working with the tech2, and it did, connects at highest speed with no issues at all.
The house power supply has an american plug on it (psu has a universal voltage of 100 to 250 volts)
i got worried when the tech2 wouldn’t even turn on, then i noticed the plug had slightly pulled out of the adaptor i had to use, something we are not used to in england as our plugs fit the sockets very securely and are hard to accidentally pull out, so changing the plug is one of the first things to do…
The house psu runs pretty warm btw.
I did all the self tests and it passed them all with flying colours (except the usual HBCC test that gets ignored (used on some ford vehicles i believe) and the RS485 that has no loopback adaptor so will always fail)
I took it out to my car (a 2011 vauxhall meriva B) and plugged it in, it connected straight away and i asked it to give me a list of DTC’s, i had been using an op-com before i got the Tech2 and the tech2 listed some old DTC’s the op-com had never picked up, I cleared the DTC’s, then tried the rest of the diagnostics available, i had no problems so far, i was able to move engine actuators (op-com can’t do that on the meriva B) operate things remotely, saw the DPF was at 108% full, so went for a little drive and the tech2 showed the DPF regen in progress, got an exhaust temp of 650 degrees C during it)
However that test drive showed up the universal weakness of the clone tech2’s, the internal power supply cuts out when you start the engine so the tech2 re-boots, this means there are a few diagnostic tests you can never do that involve starting the engine whilst the tech2 monitors things (unless you use external power to the tech2, which is advised against in all service manuals)
There is a solution, replace the internal power supply module with a better quality unit!!
There is also a highly recommended modification of removing the RS232 chip and putting a usb module in it’s place so you have a direct USB connection to the tech2, rather than the 4 connections that are just begging to be caught and pulled apart whilst uploading software to the car.
These mods are on the tech2 wiki (google it)
I then tried to SPS to my car to add a new IPC… one of the reasons i bought the Tech2.
That’s when discovered my car is not in the list of cars you use the tech2 to service program directly (the: connect tech2 to car, download data, take tech2 to computer, upload data, download software update, take tech2 back to car and upload the software method)
But i figured i could SPS using the tech2 in the J2534 pass thru mode… only my computer couldn’t connect to the tech2 in that mode… remote view of the unit worked but not SPS… i figured the issue out tho…
The rs232 to usb adapter had been assigned to com port 7 when i plugged it in, i changed the com port to COM1
~windows / computer / device manager / ports (COM & LPT) and find the relevant port your rs232 adapter is on (it wont be listed as ‘Tech2′) and change it to port 1~
Now SPS in pass thru mode works perfectly, i updated the software in a few of the modules (i use GlobalTis 32b, the last offline version with full SPS capability, was released in 2012 i believe, and it had newer software than my 2011 car had in it)
Then i did an update of the BCM and IPC to allow the rain sensor i’d just wired in to be seen by the systems, I tried to add a new immobilizer key, but it refused the accept the new key, most likely the key is at fault.. as part of learning new keys is to delete the old ones from the system, and the tech2 added them back no problem.
I’ve also used the Professional Diagnostic Tool tech2 to connect to ford vehicles using some software called ‘ForScan’ it has the Tech2 listed as a J2534 pass thru devise and works fine with it, The pcmcia card that came with the Tech2 allowed it’s self to be re-written (some people buying from other places find the card is locked and can’t be re-written)
i used GlobalTis’s card writer feature, it takes 40 minutes to write the card, but it works fine.
I’m very pleased with my Tech2 so far, the only thing that would make it perfect would be the carry case that’s shown in the photo’s, but that dosent affect how the actual devise works.
I’d recommend anyone buy their Tech2 from this obd2tool.com, and i have pointed a few people who were interested in buying one here.
Thanks to Mr.Gary Richardson for his Experience sharing.

2018年12月1日星期六

How to install GM TECH2 TIS2000 VS VXDIAG Nano VS MDI

How to install GM Tech 2 Scanner TIS2000? How to install VXDIAG NANO GM? How to install GM MDI?
Here we go:
ON the VX nano, sometimes you can get Tech2win to run on win 10 (maybe if you have an AMD chip or not, but have not figure that one out yet), while on my i7 machine, Tech 2 win will not run in win 10 instead.
Tech2win is the program that works just like a Tech II, but the program running on a laptop for the MDI (clone MDI device which the Nano is).
GDS2 is the program for the C7, like the tech II and tech2win with midi is for the C6 instead.
On the VM GDS 2 , you don’t need an account with GM MDI to use it, short of needing to do SPS programming, which you will need a TDS SPS subscription instead ($40 for 2 years per car).
gm-mdi-1
So the low down for most laptops,
Wants to be running in win 10 for TDS SPS programming.
Needs to be running a multi core chip in win 7 or above to run VM player for VM GDS2.
Need to be running in Win 7 native (32 or 64 bit) to run Tech2win (will not work in a VM shell).
Tis2000 needs to run in WinXP or built vmXP shell, so it can be native in XP or in a VM shell so long as you have a multicore processor.
So the way I do it, since Tech2win will not run native on my machine with a I7 processes in win 10, I have a dual boot up in win 7 and win 10 both.
Win 10 is used to run pretty much everything I run, short of Tech2 win, which I use the win 7 64 boot up to run it.
So in the Win 7 dual boot up (small 40 gig partition off the drive), have tech2win to use the Nano as a Tech II, plus VM GMSI, and Tis2000 in a VM shell since I may need them as well for the VX nano running as a tech II when running in win 7.
In win 10 boot up,
VM GDS2 V17
TDS using internet explorer native with account
Vm Tis2000 built on a full XP OS with account
VM GMSI
If you want to just run a single OS system, instead of a dual boot up machine since you can’t get Tech2 win to run in win10, then you can run pretty much run everything in win 7 (32 or 64 bit), so long as you have a CPU that has multi cores. Hence you going to need to run at least VM player for the VM shells, and it take as multi core processor to run VM player (or VM workstation).
Note, I have VM workstation, instead of just VM player, since I build other VM shells to run in windows as well.
So again, it really just depends on your machine, and if you Tech2win will run correctly on it or not.
Hence the problem is when you open Tech2win, you need to get three pop up screens once Tech2win start the program.
The first screen will ask you what country, and you select north America.
gm-tech2-tis2000-1
The second pop up will ask you if the device is a MDI 1 or MDI 2, and you select Mdi 1.
gm-tech2-tis2000-2
The third pop up screen will ask you if you want to select the USB device (the nano plugged into a USB port), you select it, then it will take you to the Tech2win start screen.
gm-tech2-tis2000-3
So if you open Tech2win, and you don’t get the three pop up screens but just goes directly to tech2win main start screen below instead, then Tech2win is not going to work on your machines win 10 . Hence the problem is a glitch in midi and tech2 win interface to select the nano to begin with (what the pop up screens are), and if you can’t select the nano via the pop up screens, tech2win will not connect to the nano in the first place.
gm-tech2-tis2000-4
Again don’t know if this is a AMD verse Intel CPU problem in win 10, but the only laptops that I have seen run Tech2win in windows 10, just happened to be laptops running a AMD CPU instead. And yes, have tried to skin the cat many way with added drivers and compatibility modes, and it’s driver/code line that win 10 does not have for the intel CPU (but seems to to have for the AMD CPU that is a carry over from the win 7 days to make the AMD chip work with win 10 instead).
==============
Case study
My new GM Tech2 bought from obd2tool.com
It is in perfect working order and has the screen cover.
Also included is the TIS2000 software which you will need to access the security to program keys
gm-tech2-tis2000-5
gm-tech2-tis2000-6
TIS2000 installation guide:
Small glitch running TIS200, and unless your laptop/computer has a RS232 port to plug the Tech II cable into it, your going to need an usb cable instead.
Or Here is the driver link needed for the VM XP that the TIS2000 is going to run native in and will need to be installed in the VM shell for the usb cable.
https://support.automationdirect.com/products/usbrs232.html
On the above link, several older OS’s are listed for the driver downloads, one being MS Vista. However in the minimum system requirements sections for the OS, Vista is not listed.
TS2000 and WIN software only runs on XP ,the drivers that are listed are for the USB to RS232 port adapter you have to by if your computer does not have a 232 port.

2018年8月18日星期六

How do you think of Tech 2 made in china

Please advise: what do you think of Tech 2 made in china:
17-1
I bought my Tech2 from obd2tool.com and it works great. Cannot really compare software with a Tech2 as that is comparing hardware to a program. That being said, there is a software side of things that work alongside the Tech2 which is the TIS2000 software. Getting that working is a bit of a project in and of itself as the software is old and seems to work best on Windows XP. The TIS2000 software is really not needed to use the Tech2 though – that is needed if you want to update the firmware in the various modules in your vehicle like the ECU, BCM, DDM, etc.
Simply put though. There is no other tool that can do everything on your H2 that the Tech 2 can do. It is the only tool with things that are very specific like calibrating the rear air suspension module. Other tools can be very powerful but that are mostly just have features that are common to many vehicles and will not have things that are specific to just one or two vehicles.
I cannot speak for any on OBD2TOOL. I’ve seen both good and bad reviews on the ones from there. Also the link you gave just takes me to the Aliexpress home page. Regardless it would not matter as again, I have no way of knowing if one from some seller on there will be a good one or not.
It is also worth spending the extra to get the case which does cost a good bit more. These come with a lot of different adapters and parts and the case makes it very nice and easy to keep it all together.
This is the kit that I ordered. It also includes the Professional Diagnostic Tool Candi module which is needed for many newer model GM vehicles.

http://forobd2tool.com/blog/2018/08/07/how-do-you-think-of-tech-2-made-in-china/

2018年4月26日星期四

GM TECH2 program DDM, enable comfort opening closing and learn pinch

Device to use:
GM TECH2
Security via TIS2000! Without this you won’t be able to add anything!!!
I bought GM Tech 2 $358 (shipping not included), details:
TIS2000 $18 free shipping, from OBD2TOOL
Step –by – Step Procedure
1.Go to “Main Menu”, select “Diagnostics”
4-1
2.Select one of the following model year(s), I.E 2004
4-2
3.Select one of the following vehicle type(s), I.E Saab 9-3 Sports (9440)
4-3
4.Select “Add/ Remove”
4-4
5.Select “Control Module”
4-5
6.Select “DC04”
4-6
7.Select “Add”
4-7
8.Select “Checking Security Access” –Working
4-8
9.Select “Adding Unit”
4-9
10.Select body type – Convertible
4-10
11.Select “Comfort Movement” – Both comfort opening and closing
4-11
12.Press “Yes” to continue with your selection.
4-12
13.Select “With Anti-Pinch”
4-13
14.Press “Yes” to continue with your selection.
4-14
15.Select “Manual” as foldable mirrors.
4-15
16.Select “Body type”
4-16
17.Press <Enter> to Continue
4-17
Thanks for reminding me Tech2! I will do this down below!
18.pdating “Bus Config”
4-18
19.Looks like Car Scanner Tech2 caught an error! Passenger door’s anti-pinch was disabled somehow… It fixes it automatically.
4-19
20.Add / Remove ECU finished
4-20
So that was pretty straight-forward right? Now hit Exit and go back. We have to setup pinch protection under the service tab…
21.Select “Service”
4-21
22.Select “Learn Anti-Pinch”
4-22
23.Press <Enter> to Continue
4-23
24.Press <Enter> to Continue
4-24
25.Holy Cow! My fingers almost were chopped off!!!
4-25
26.Press <Exit> to quit
4-26
http://cheapobd2scanner.com/2018/04/23/gm-tech2-program-ddm-enable-comfort-opening-closing-and-learn-pinch/