2020年9月11日星期五

The solution of Digimaster 3 Insufficient Memory or File Copy Error

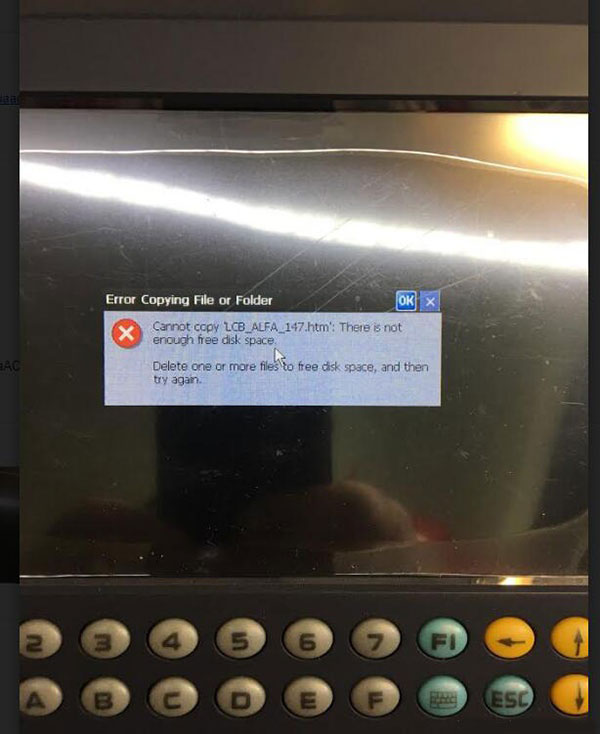
If your Yanhua Digimaster 3 meet error like this  below:

Digimaster3-No-Memory-Solution-1

Error:

Cannot copy “LCB_ALFA_147.htm”. There is not enough free disk space.

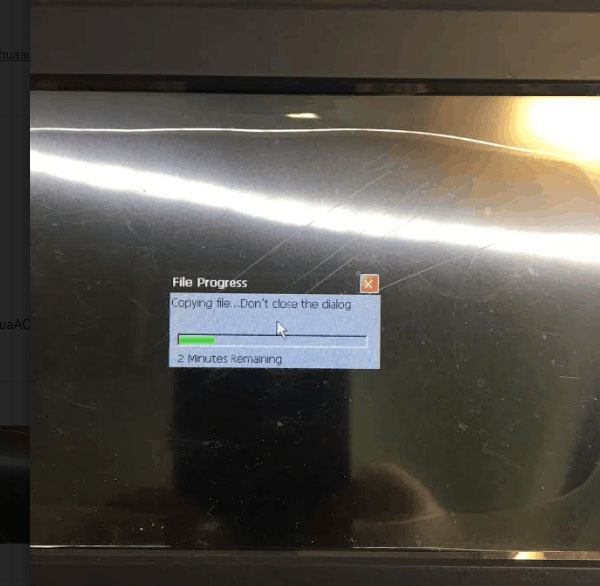
Digimaster3-No-Memory-Solution-2

Solution:

1. Turn off DigimasterIII and turn on again, when you enter Digimaster 3 system, there will be a notice asking to download a management program or black screen. Please ignore and press “keyboard” + “E” to enter the resource manager.

2. Find the “NandFlash” icon, double click “NandFlash”, delete the “YHTech” file folder. If the file folder cannot be deleted, please restart and try again.

3. After you delete the file, copy the necessary “YHTech” file folder and “NK_D3.ROM” file to SD card.

4. Press “1” + “Keyboard” and turn on the power switch, start to refresh the inner core.

5. When the inner core refresh is finished, and the Digimaster III start icon can be seen, press the “F1” and “5” button in turn immediately, copy files from the SD card to FLASH.

6. When copy finished, you’ll be able to turn it on successfully

2020年8月25日星期二

FIAT Viaggio 2012 Seatbelt ReminderAlert Activation by Launch X431


This instruction show you guide how to use Launch X431 to activate seatbelt reminder for FIAT Viaggio. Before running the car, the vehicle opens a seatbelt alerting function for passengers, ensure the car safety.For more Fiat repair,please check here:FIAT Trouble Repair
FIAT-Viaggio-2012-Seatbelt-ReminderAlert-Activation-by-Launch-X431-1

What You Need?

Launch X431 V+

Procedures:

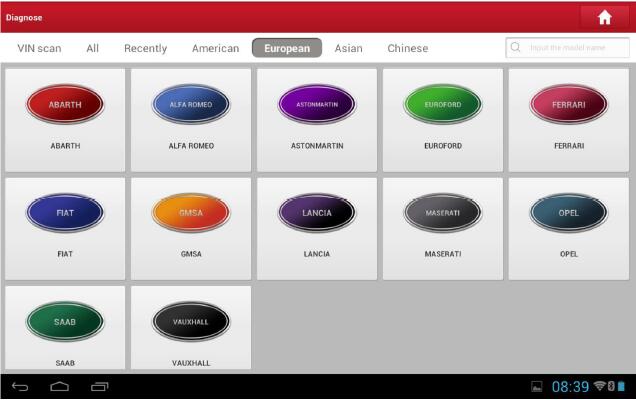
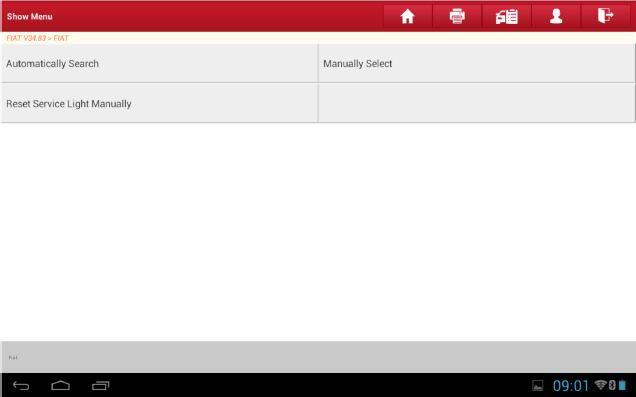
1.Select “Fiat” V34.32 above

FIAT-Viaggio-2012-Seatbelt-ReminderAlert-Activation-by-Launch-X431-2

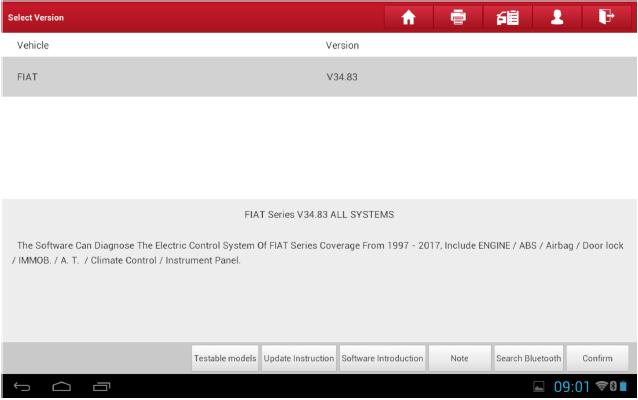
2.Confirm the Version

FIAT-Viaggio-2012-Seatbelt-ReminderAlert-Activation-by-Launch-X431-3

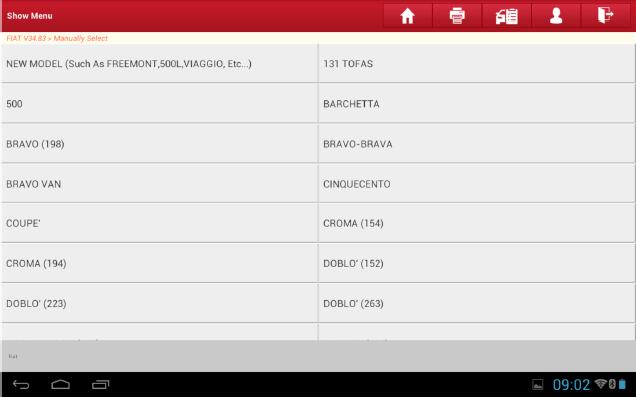
3.Select “manual selection”,

FIAT-Viaggio-2012-Seatbelt-ReminderAlert-Activation-by-Launch-X431-4

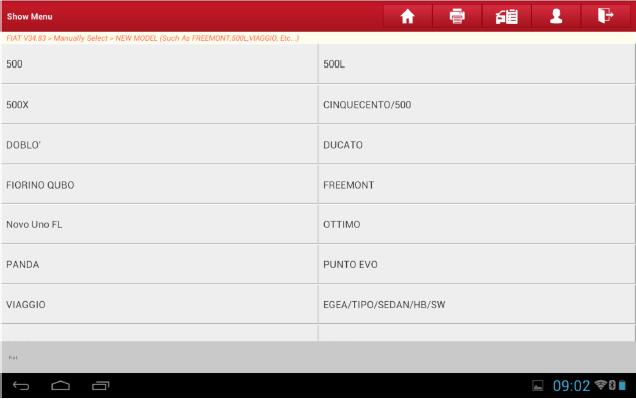
4.Select the New Car model(such as Freemont,500L,Viaggo Etc)

FIAT-Viaggio-2012-Seatbelt-ReminderAlert-Activation-by-Launch-X431-5

5.Select “VIAGGIO”

FIAT-Viaggio-2012-Seatbelt-ReminderAlert-Activation-by-Launch-X431-6

6.Select 2012

FIAT-Viaggio-2012-Seatbelt-ReminderAlert-Activation-by-Launch-X431-7

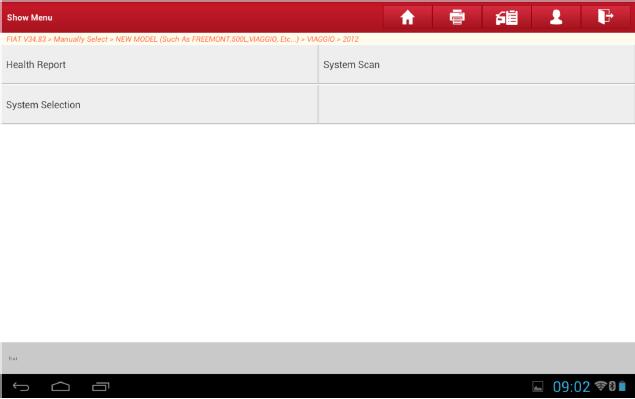
7.Select system selection

FIAT-Viaggio-2012-Seatbelt-ReminderAlert-Activation-by-Launch-X431-8

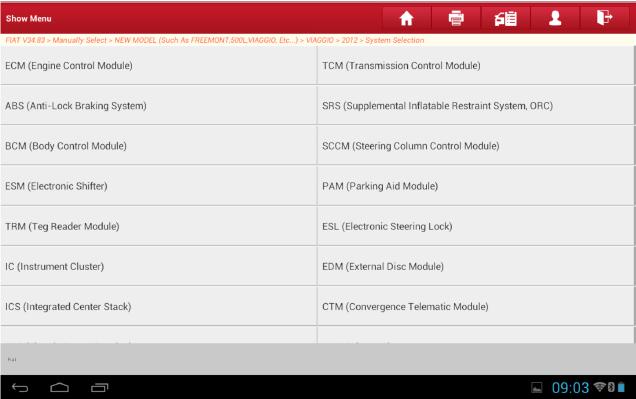
8.Select IC(Dashboard) system

FIAT-Viaggio-2012-Seatbelt-ReminderAlert-Activation-by-Launch-X431-9

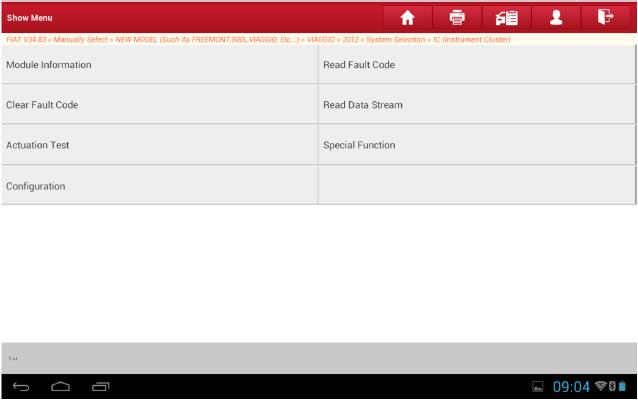
9.Select special function

FIAT-Viaggio-2012-Seatbelt-ReminderAlert-Activation-by-Launch-X431-10

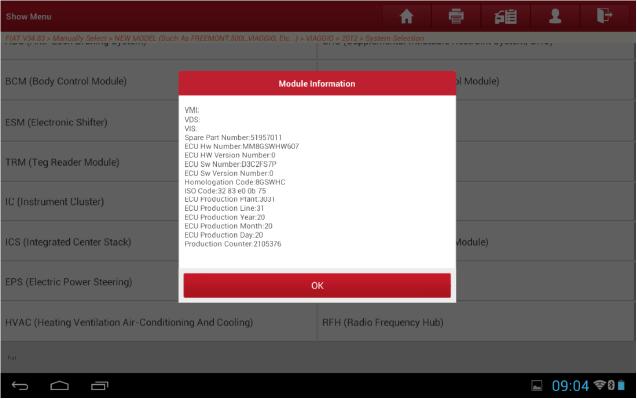
10.After selecting the IC(dashboard)system,display the version information

FIAT-Viaggio-2012-Seatbelt-ReminderAlert-Activation-by-Launch-X431-11

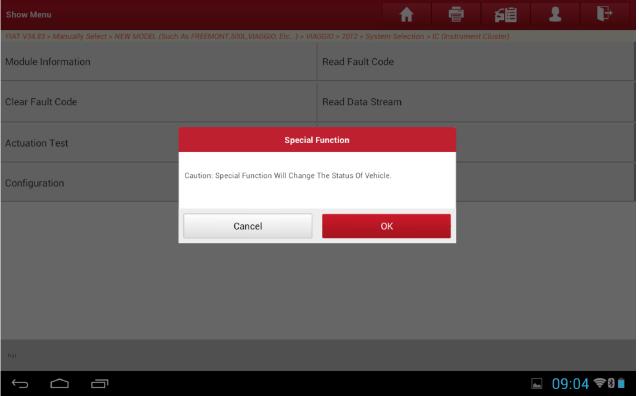
11.Select”Special Function”

FIAT-Viaggio-2012-Seatbelt-ReminderAlert-Activation-by-Launch-X431-12

FIAT-Viaggio-2012-Seatbelt-ReminderAlert-Activation-by-Launch-X431-13

 
12.Select”Multi-Function”

FIAT-Viaggio-2012-Seatbelt-ReminderAlert-Activation-by-Launch-X431-14

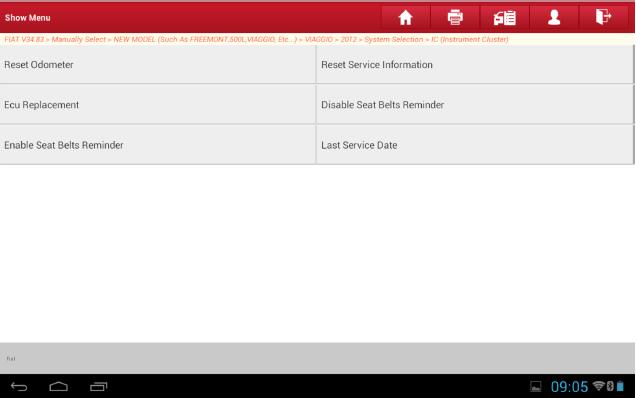
13.Enable seatbelt reminder

FIAT-Viaggio-2012-Seatbelt-ReminderAlert-Activation-by-Launch-X431-15

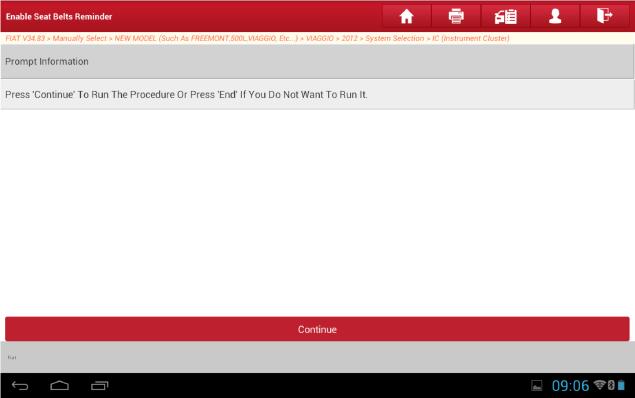
14.Click continue

FIAT-Viaggio-2012-Seatbelt-ReminderAlert-Activation-by-Launch-X431-16

15.Continue

FIAT-Viaggio-2012-Seatbelt-ReminderAlert-Activation-by-Launch-X431-17

16.Function Execution Success.

FIAT-Viaggio-2012-Seatbelt-ReminderAlert-Activation-by-Launch-X431-18

More test report about Launch X431 please check:Launch X431 Test report

How to do Actuation Test by Launch Thinkcar Thinkdiag


Step by step to use Launch Thinkcar Thinkdiag to do Actuation Test.

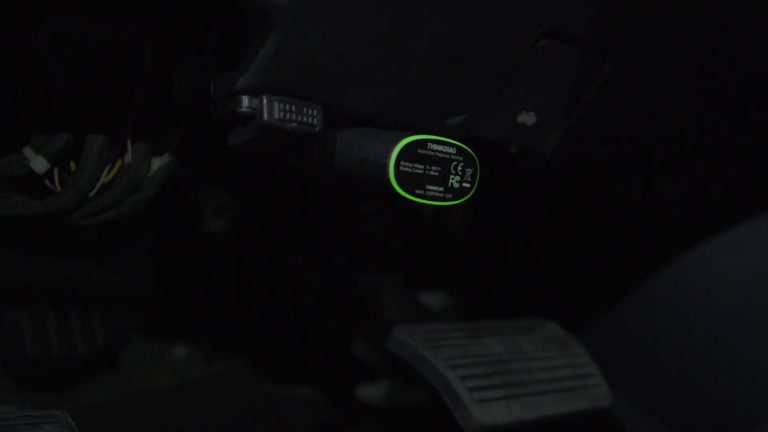
1. Plug Thinkdiag into the obd2 port of car, hear the beeps and see the green indicator light indicating that is connected. We have the engine on for the car.

How-to-do-Actuation-Test-by-Launch-Thinkcar-Thinkdiag-1

2. Select “All systems full function”

How-to-do-Actuation-Test-by-Launch-Thinkcar-Thinkdiag-11

3. Going to scan the vehicle’s VIN number.
About 20 seconds there found the VIN number and we connect to the vehicle.

How-to-do-Actuation-Test-by-Launch-Thinkcar-Thinkdiag-10

4. Select “System selection”.

How-to-do-Actuation-Test-by-Launch-Thinkcar-Thinkdiag-9

5. Body Control Module (BCM).

How-to-do-Actuation-Test-by-Launch-Thinkcar-Thinkdiag-8

6. Select “Actuation Test”.

How-to-do-Actuation-Test-by-Launch-Thinkcar-Thinkdiag-7

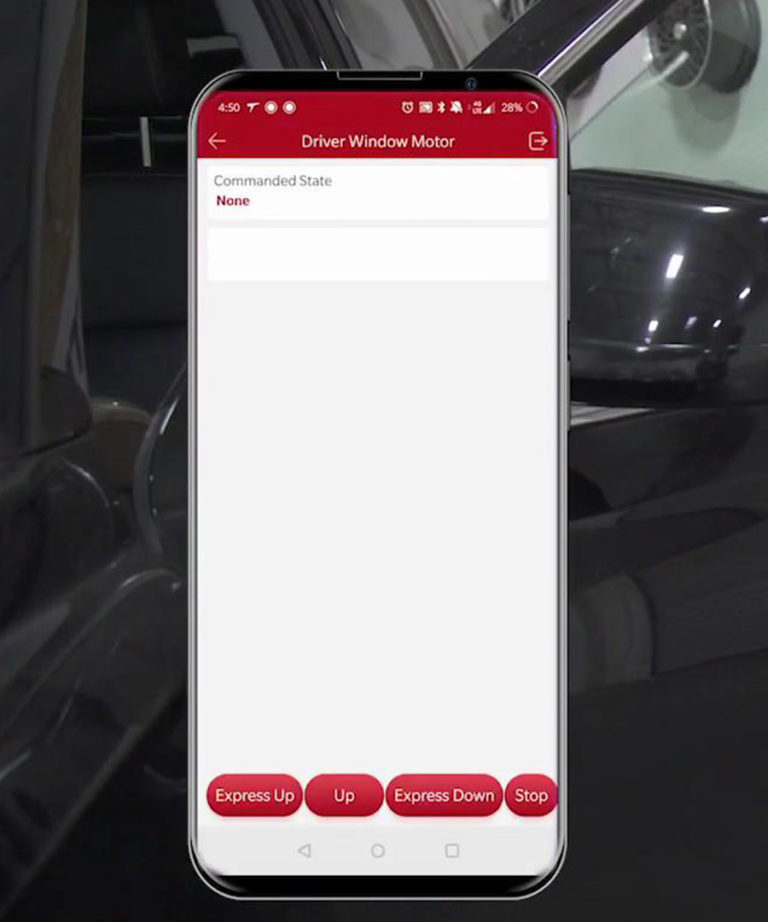
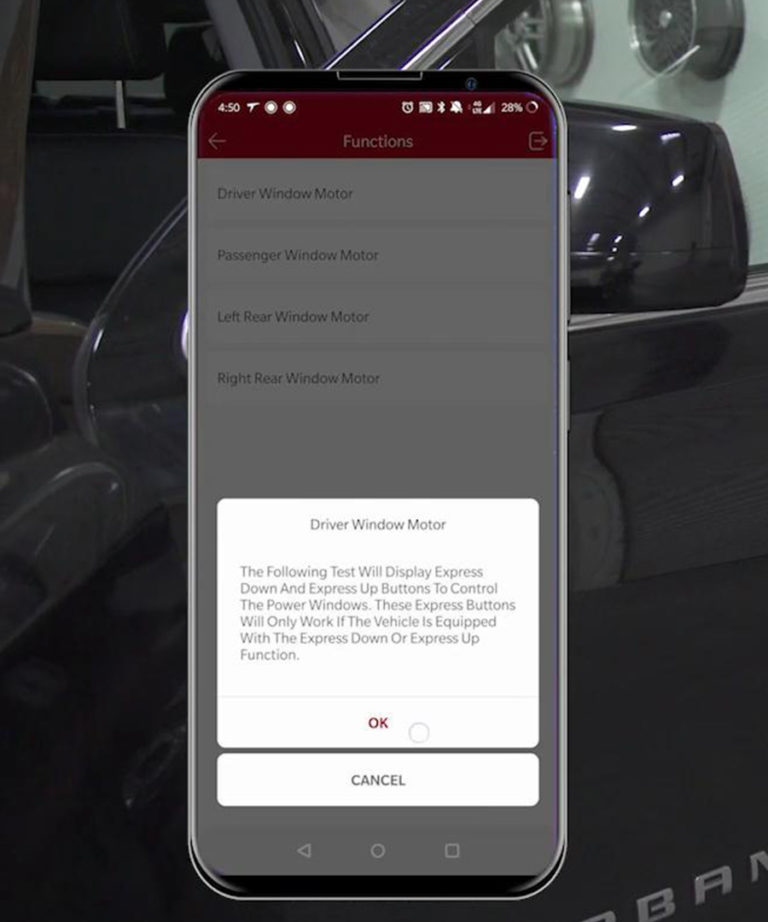
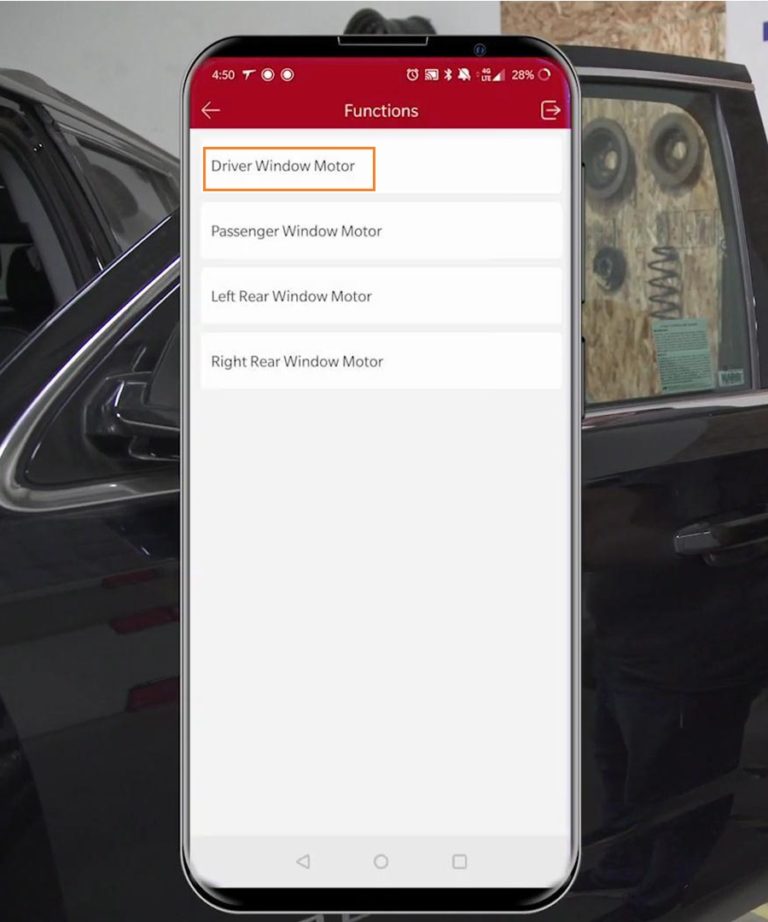
7. Select “Driver window motor”.

How-to-do-Actuation-Test-by-Launch-Thinkcar-Thinkdiag-7

8. We can also select “Windshield Washer relay”, so “Active”.

How-to-do-Actuation-Test-by-Launch-Thinkcar-Thinkdiag-8
How-to-do-Actuation-Test-by-Launch-Thinkcar-Thinkdiag-9
How-to-do-Actuation-Test-by-Launch-Thinkcar-Thinkdiag-10

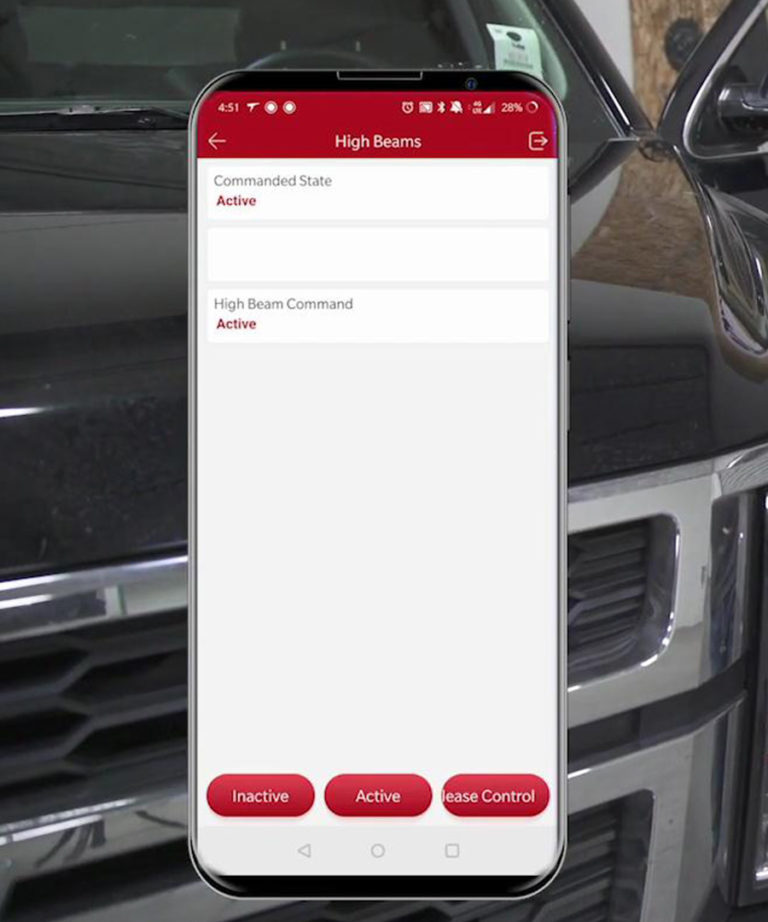
9. Last to show “High beams” active, I see they come one. And activate or deactivate and they turn off .

How-to-do-Actuation-Test-by-Launch-Thinkcar-Thinkdiag-11

Okay, that’s the Launch thinkdiag device’s performance.

2020年8月10日星期一

Possible to use Digiprog 3 v4.94 for Porsche Cayman odometer correction


Possible to use Digiprog 3 v4.94 for Porsche Cayman odometer correction?
Yes. Here is the Cayman with chip types confirmed to work:
Porsche Cayman 93C86
Porsche Cayman MCU 35P08
Porsche Cayman 2010 95640
Porsche Cayenne Diag

In detail…

Porsche Cayman 93C86

Note Tacho Meter Value

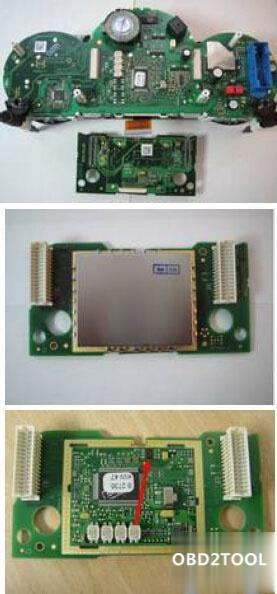
Dismantle Tacho

Possible-to-use-Digiprog-3-for-Porsche-Cayman-odometer-correction-1 (3)
Possible-to-use-Digiprog-3-for-Porsche-Cayman-odometer-correction-2 (3)

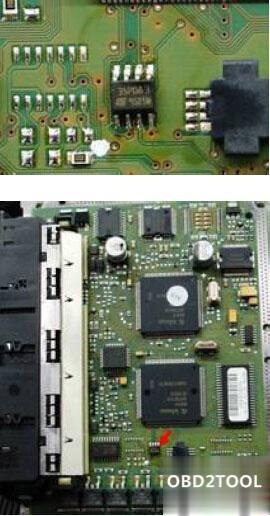
Identify Chip 93C86
Desolder Chip 93C86
Clean Chip 93C86

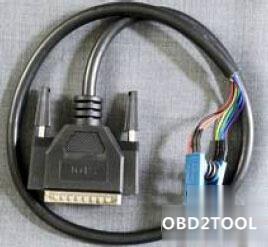
Set Plug ST01 on Chip

Possible-to-use-Digiprog-3-for-Porsche-Cayman-odometer-correction-3 (3)

Red Cable on PIN 1
Font readable / PIN 1 bottom left
Choose programm
PKW/LKW—Porsche-Cayman-93C86
Data Back up / Data restore
Data Back up EEPROM
Chip type
Read Data
Write Data

or

Data restore EEPROM
Load Data
Connect replace tacho
Choose Vehicle progra
Enter KM value and confirm Entry
Programming operation completed

Porsche Cayman MCU 35P08

Note Tacho Meter Value
Dismantle Tacho

Possible-to-use-Digiprog-3-for-Porsche-Cayman-odometer-correction-4 (3)
Possible-to-use-Digiprog-3-for-Porsche-Cayman-odometer-correction-5 (3)

Choose programm
PKW/LKW—Porsche-Cayman-93C86
Data Back up / Data restore
Data Back up EEPROM
Chip type
Read Data
Write Data

or

Data restore EEPROM
Load Data
Connect replace tacho
Choose Vehicle program
Enter KM value and confirm Entry
Programming operation completed
Porsche Cayman 2010 95640
Note Tacho Meter Value
Dismantle Tacho

Possible-to-use-Digiprog-3-for-Porsche-Cayman-odometer-correction-6 (3)
Possible-to-use-Digiprog-3-for-Porsche-Cayman-odometer-correction-7 (3)

Identify Chip 95640
Desolder Chip 95640
Clean Chip 95640
Set Plug ST01 on Chip

Possible-to-use-Digiprog-3-for-Porsche-Cayman-odometer-correction-8 (3)

Red Cable on PIN 1
Font readable / PIN 1 bottom left
Choose programm
PKW/LKW—Porsche-Cayenne-2010-95640
Data Back up / Data restore
Data Back up EEPROM
Chip type
Read Data
Write Data
or
Data restore EEPROM
Load Data
Connect replace tacho
Choose Vehicle program
Enter KM value and confirm Entry
Programming operation completed
Porsche Cayenne Diag
Note Tacho meter value
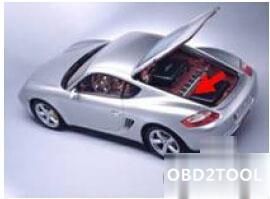
Diagnosis connection is located Engine Compartment

Possible-to-use-Digiprog-3-for-Porsche-Cayman-odometer-correction-9 (3)
Possible-to-use-Digiprog-3-for-Porsche-Cayman-odometer-correction-10 (3)

Connect Diagnosis Port with Plug 16
Ignition on
Connect DigiProg about Plug 16
The DigiProg needs no separate electricity supply, it is
supplied about the diagnosis port
choose program
PKW/LKW– Porsche-Cyenne-Diag
Enter KM value and confirm Entry
Programming operation completed

Digiprog 3 Porsche car list:
Possible-to-use-Digiprog-3-for-Porsche-Cayman-odometer-correction-11 (3)

Porsche 911 (996)
Porsche 911 (996)Turbo
Porsche 928
Porsche 987
Porsche 996 09/01/2000 Diagnostic
Porsche 996 2000/2002 BCU Programming Via Box
Porsche 996 Turbo Ready Soon
Porsche 996 to 08/01 Diagnosis
Porsche 996 up 09/01 93C86 Diagnostic
Porsche 997
Porsche 997 MCU Program via chip
Porsche 997 Tacho & MCUs
Porsche Boxster (9686/987)
Porsche Boxster Diagnosis
Porsche Cayenne 2002-2010
Porsche Cayenne 2010 – to PRESENT YEAR
Porsche Cayenne Diagnostic
Porsche Cayman (987)
Porsche Cheyenne
Porsche Panamera]

Digiprog 3 Chrysler Jeep Dodge Odometer Correction Car List and Wiring


Digiprog3 v4.94 odometer correction tool possibilities on Chrysler, Jeep and Dodge:

Chrysler odometer correction using Digiprog 3:

Chrysler (Plymouth) Prowler
Chrysler 300 HC12 Programming Via Micro
Chrysler 300M
Chrysler 300c
Chrysler 300c HC12
Chrysler All Models
Chrysler All Models Diagnostic
Chrysler Cherokee Modell 2002
Chrysler Cherokee Modell 2002 Diagnostic
Chrysler Cherokee to Chip 56
Chrysler Crossfire
Chrysler Crossfire Diagnostic
Chrysler Grand Cherokee
Chrysler Grand Cherokee 04/99
Chrysler Grand Cherokee 04/99 Diagnostic
Chrysler Grand Cherokee C86 Program via chip
Chrysler Grand Cherokee HC12
Chrysler Grand Cherokee HC12 Diagnostic
Chrysler Grand Cherokee to 03/99
Chrysler Grand Cherokee to 03/99 Diagnosis
Chrysler Le Baron Only in our Office / In progress
Chrysler Neon HC12
Chrysler PROWLER
Chrysler PT Cruiser -2007
Chrysler PT Cruiser HC12 Diagnostic
Chrysler PT Cruiser to 2007-
Chrysler PT Cruiser to HC11 Diagnoctic
Chrysler Pacifica HCS12
Chrysler Seebring HC12 Programming via Cluster
Chrysler Stratus
Chrysler Stratus Diagnosis
Chrysler Voyager Modell 2002 HC12 Cluster-Diagnosis
Chrysler Voyager to Bj. 2001
Chrysler Voyager to Bj. 2001 Diagnosis
Chrysler Wrangler
Chrysler Wrangler HC11 Programming via Micro

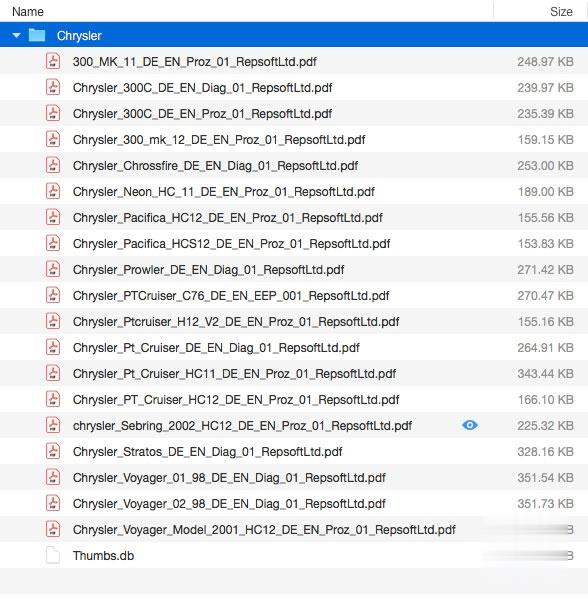
Attachment: digiprog 3 chrysler help files (wiring diagram)

digiprog-3-odometer-correction-chrysler (2)

Jeep odometer correction using Digiprog 3:

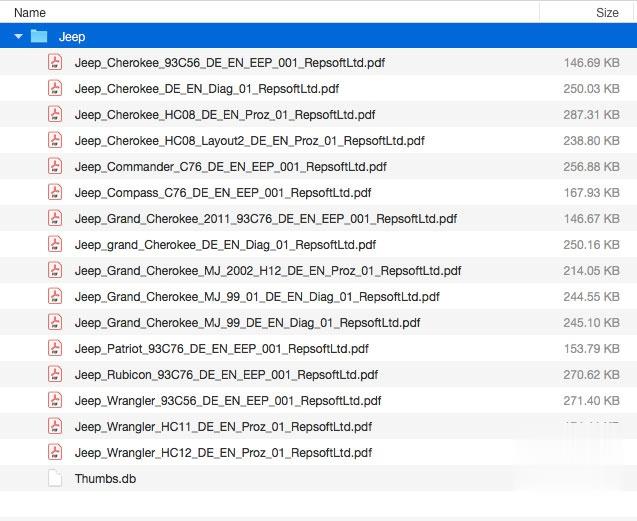
Jeep CHEROKEE 2008- C76
Jeep Cherokee 2007-2008
Jeep Cherokee 2008-
Jeep Commander
Jeep Compass
Jeep Grand Cherokee 2005 – PRESENT YEAR
Jeep Grand Cherokee 2005-
Jeep Patriot
Jeep Patriot
Jeep Ratriot
Jeep Wrangler
Jeep Wrangler 2007-

Attachment: digiprog 3 jeep help files (wiring diagram)

digiprog-3-odometer-correction-jeep (2)

Dodge odometer correction using Digiprog iii:

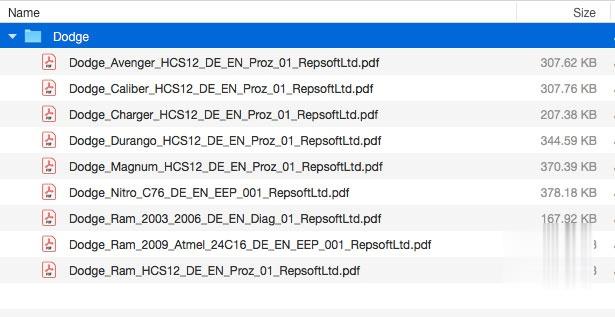
Dodge Avenger HCS12
Dodge Caravan
Dodge Caravan 2007-
Dodge Caravan HCS12
Dodge Challenger
Dodge Charger 24C16
Dodge Durango
Dodge Journey
Dodge Magnum
Dodge Nitro
Dodge Ram 2003
Dodge Ram 2003 Diagnostic
Dodge Ram 2003-2006

Attachment: digiprog 3 dodge help files (wiring diagram)

digiprog-3-odometer-correction-dodge (2)

Tip: What’s the best combination for Chrysler/dodge/jeep km change?
Obdstar x300m is your way to go, since obdstar has better compatibility of new chrysler while digiprog 3 is for old
models.

Look here: OBDSTAR X300M chrysler/dodge/jeep vehicle coverage
 
Obdstar X300M CHRYSLER V30.45
CHRYSLER
1500
2002-2005
2000-2001
200
2015
2010-
2500
2003-2005
300
2015-
300C
2018-
2015(D70F3525)
2011-
-2010
300M
2001-2004
1998-2000
3500
2003-2005
ASPEN
2006-
AVENGER
2010-
2007-2009
CALIBER
2009-
2006-2008
CARAVAN
2012-
2011
2008-2010
2001-2007
CHARGER
2018-
2016-
2015(D70F3525)
2011-
2004-
CHEROKEE
2018-
2015
COMMANDER
2018
2017
2005-
COMPASS
2018-
2018
2008-
2005-2007
CONCORD
2001-2004
1998-2000
DAKOTA
2004-
2001-2003
DART
2012-
DURANGO
2018-
2014-
2011-
2007-2010
2004-2006
2001-2003
GRAND CHEROKEE
2018-
2014-
2011-
2005-2010
2002-2004
CHALLENGER
2018-
2015(D70F3525)
INTEREPID
2001-2004
1998-2000
JOURNEY
2011-2012
2008-
LHS
2001-2004
1998-2000
LIBERTY
2008-
2002-2007
MAGNUM
2004-
NEON
2001-
1999-2001
NEW SEBRING
2007-
2001-2006
NITRO
2006-
PACIFICA
2018-
2017-
2007-
2003-2006
PATRIOT
2014-
2006-
PT CRUISER
2006-
2002-2005
1999-2001
RAM
2018-
2013-
2011-
2009-
2006-2008
RAM-700
2015
RENEGADE
RENEGADE 2018-
RENEGADE
SEBRING
2010-
2007-2009
2001-2006
SRI
SRI-6 2010-
SRI-5 2005-
SRI-4 2005-
SRI-3 2005-
SX
SX-2.0 2001-
TJ/YJ/CJ
2007
2003-2005
VOYAGER
2015-
2008
2001-2007
WRANGLER
2007-
2003-2005

2020年7月7日星期二

How to enable OEM Porsche PIWIS III to Developer (Engineer) Mode on Lenovo S1 yoga12 Laptop

How to enable OEM Porsche PIWIS III to Developer (Engineer) Mode on Lenovo S1 yoga12 Laptop?
Related Product:
V38.900 Porsche Piwis 3 Tester III PT3G Diagnostic with SSD Software Installed Lenovo S1 yoga12 Laptop
For Newer Porsche Models:
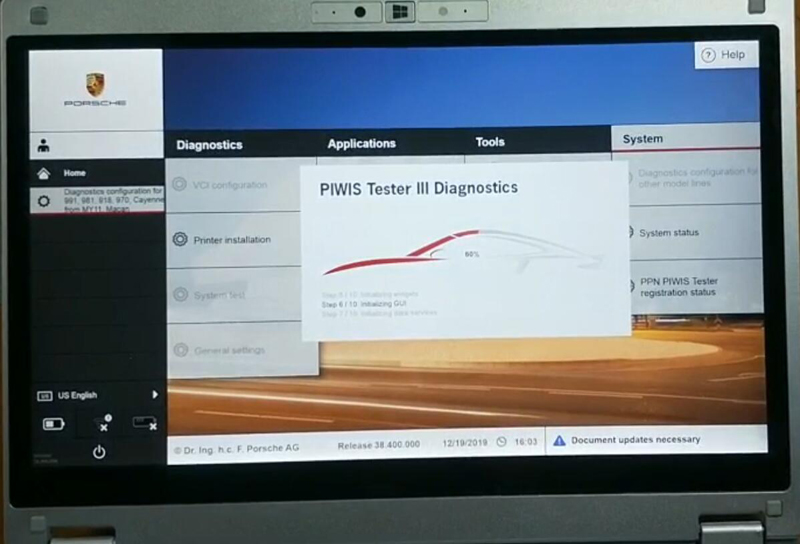
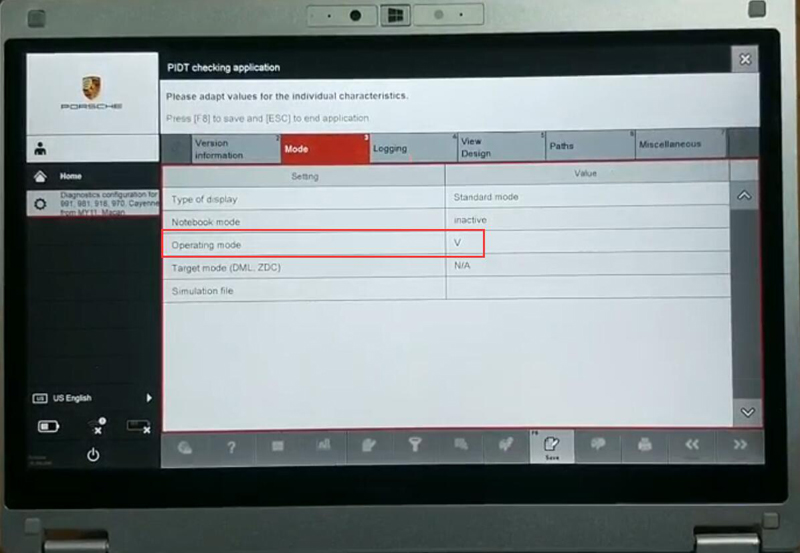
Go to Home->System->Diagnostic configuration for 991, 981, 918, 970, Cayenne from MY11, Macan
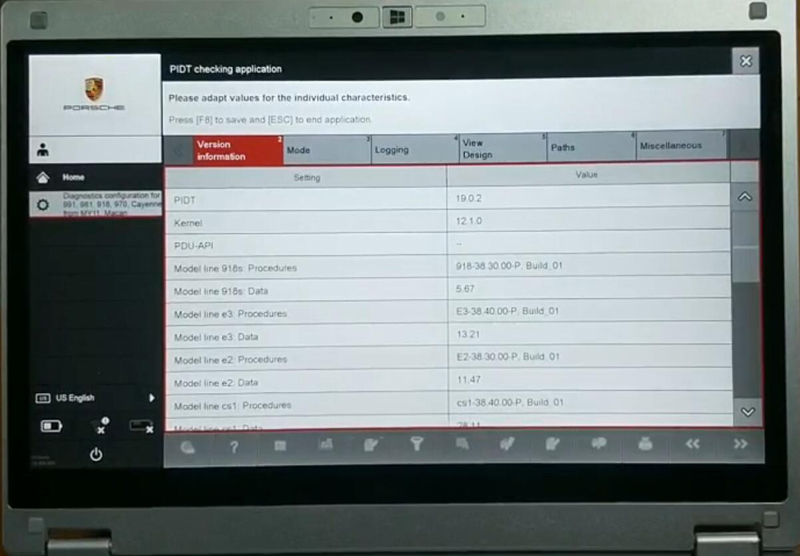
Go to Mode tab
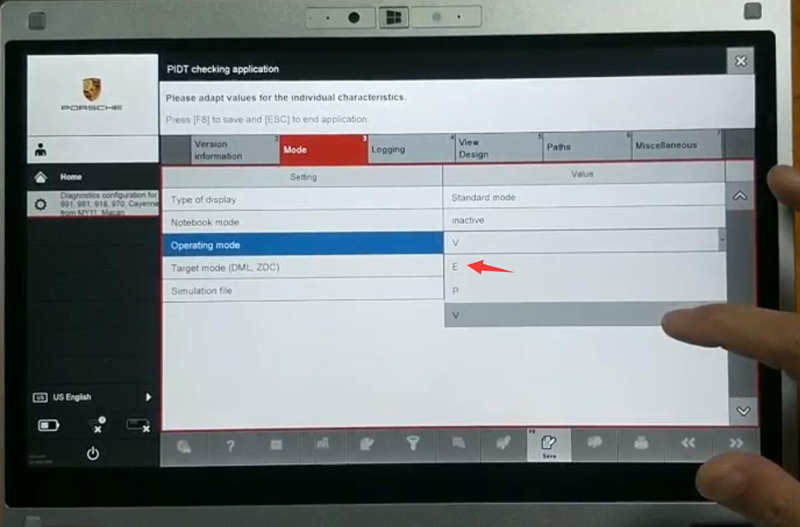
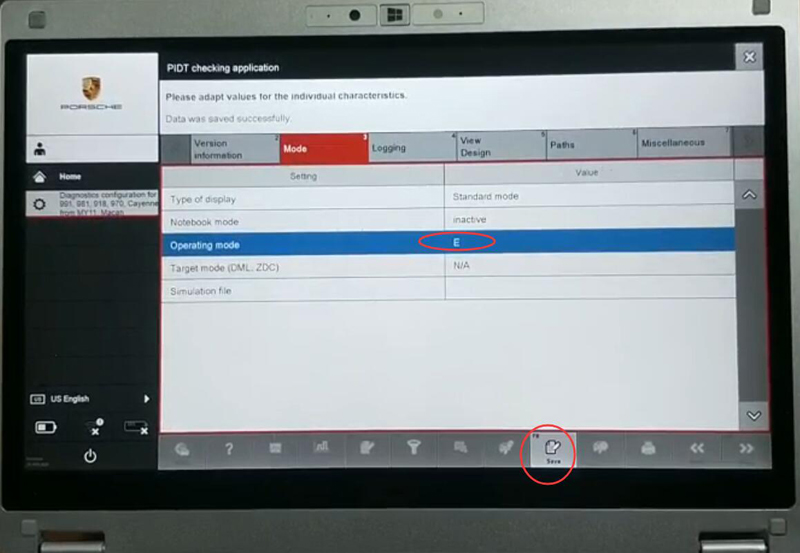
Set Operating Mode to E
Enable-Piwis-Iii-Developed-Mode-1
Enable-Piwis-Iii-Developed-Mode-2
Enable-Piwis-Iii-Developed-Mode-3
Enable-Piwis-Iii-Developed-Mode-4
3 Modes available:
V mode: Standard After-sales Mode for Porsche Piwis 3 ordinary diagnostics
E mode: Development Mode for Piwis III engineering software functions
P mode: Production for supplier data information (Customers no need work on P mode) and save setting
Enable-Piwis-Iii-Developed-Mode-5
For Older Porsche Models:
Go to Home->System->Diagnostic configuration for other models-> Mode->Operate Mode->E (Engineer Mode)->Save

Porsche PSE Retrofit Coding with PIWIS Tester

The coding procedure can be applied to All Porsche Models.
Diagnostic system required: Porsche Piwis II, PIWIS Tester III
PSE retrofit coding is done as follows:
The sports exhaust system button can only be coded on the right-hand side of the switch console.
Code keypad assignment.
REPLACING SWITCH CONSOLE (ALL MODELS) > ENABLING SPORT/SPORT PLUS/SPORT CHRONO PLUS FUNCTION
Information
On vehicles with the equipment variant SPORT/SPORT Plus/Sport Chrono Plus, a function enable process must be carried out after replacing the switch console.
1. Determine function enabling code in PIWIS.
2. Connect the Porsche PIWIS Tester to the vehicle and start the System Tester. Switch on ignition.
3. Select the vehicle type and start the PIDT.
4. Select Air conditioning control unit using the cursor keys and press [F12].
5. Select Drive links/checks .
6. Select Function enable using the cursor keys and press [F12].
7. Enter the function enabling code and save it by pressing [F8].?
REPLACING SWITCH CONSOLE (ALL MODELS) > ENABLING SPORT/SPORT PLUS/SPORT CHRONO PLUS FUNCTION > CODING KEYPAD
ASSIGNMENT
1.Connect the Porsche PIWIS 3 to the vehicle and start the System Tester. Switch on ignition.
2. Select the vehicle type and start the PIDT.
3. Select Air conditioning control unit using the cursor keys and press [F12].
4. Select Codings/adaptations .
5. Select Customer-specific settings using the cursor keys and press [F12].
6. Select Keypad assignment and press [F12].
7. Check the button assignment using the switch console.?
7.1. Select function of the switches from the shortcut menu if necessary.?
8. Press [F8] to save the button assignment.
9. The message Data has been written appears on the Tester screen. Press [F12] to exit.
10. Read out the fault memory and erase it if necessary.
11. Check the function of the switch console during a test drive.?
Maintenance of vehicle data
Select Additional menu by pressing F7 .?
Select the Maintenance of vehicle data function. Press F12 until M numbers? appears in the Value group column.?
Select 176 – Sports exhaust system in the Coding value column. When you? touch the Installed cell, a tick appears.?
Save the values by pressing F8 . Wait until the message Modified values have? been buffered appears.?
Press F12 until F8 can be activated.?
Press F8 to write values. Wait until the message Generation of vehicle data is? complete appears.?
Press F12 to switch to Log management. Open the log by pressing F10 and? check that vehicle equipment 176 Sports exhaust system is displayed.?
Adapt coding
Press F11 to return to the list of control units.?
Select all control units.?
Switch to the Codings/adaptations menu.?
Select Automatic coding. Press F12 to continue. Wait until the message Coding has been completed successfully appears. Press F12 to continue.?
Once coding is complete, read out the fault memories of all systems, work through any existing faults and erase the fault memories.